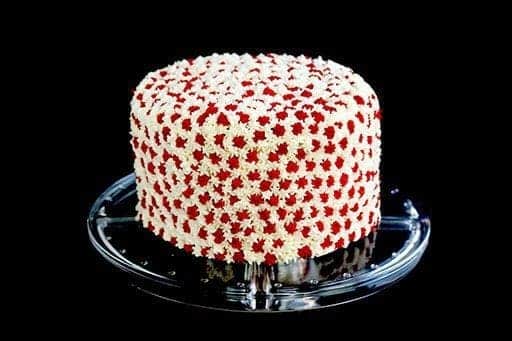
I’d like to introduce you to a new series of mine, called Attainable Eats and the inaugural post, my Simple Canada Day Cake.
The inspiration for this new series came while I was at BlogHer Food, listening to an amazing writer talk all about her experiences travelling, eating her way around the globe – we’ve all read the books and stories by writers like this- and wistfully yearning to be able to do something like that. I sighed inwardly with jealousy and thought “that’s just not attainable for me at this point in life.”
And the seed was planted. Started growing and sprouting and started my gears a whirling in my head.
Sometimes -and I’ll just speak for myself but I do notice it elsewhere- I ignore the fact that not everything I make and post on this site is attainable eating. This was reaffirmed by a conversation with my neighbor when I returned from my trip. She had wanted a recipe for icing and we all know that my Best Buttercream Icing is by far the most popular recipe here on the Kitchen Magpie. So I gamely offered it up to her, assuring her that she would love it.
Then she asked about the cake.
“Oh my Lord, ” I replied “ I have the BEST chocolate cake recipe too!”
“But is it easy?” she asked.
“Hhhm…well you melt real chocolate into hot coffee, it has buttermilk, it’s seriously to die for.” I answered, lost in my love of that cake.
“But IS IT EASY, Karlynn? I need easy!” she persisted, laughing at my apparent obtuseness.
And I had to pause a moment.
The answer was no. Baking cakes from scratch is not always easy. The recipe I love is not easy. I have time, more so than most people I know, because I’m at home all day. That darn cake still takes me forever and a day to make and it’s my go to recipe.
The best definition I came across for attainable is “capable of happening or existing.”
So the recipes in this new series of mine are ones that everyone is capable of making. These recipes can and will happen for you. They will be simple, need very few supplies, not take an entire day and like this cake, sometimes use “cheater” shortcuts, like cake mixes.
Yup. I just said cake mixes.
After years of baking it’s easy to become a snob and forget that not everyone has the time or the inclination to make everything from scratch. Like my neighbor, who works full-time days and still is baking up her daughters own birthday cake.
Is her daughter going to know her mom used cake mixes and scornfully set the cake aside? Nope. What that cutie pie is going to remember is that her mom made her birthday cake. Iced the cake herself. Is she any less of a Super Mom because she used cake mixes?
Not at all.
So forgive me if I became a little bit of a baking snob over the years here. I apologize. It’s easy to forget how once you too, used cake mixes – nothing like Rainbow Bit baby!- and once struggled to balance time and the need to create at home.
This series will be good for me as well as you, my readers.
To start out the series with a bang, I really wanted to showcase a cake that anyone can make. Not only can you make it, it’s a showstopper looks-wise. Show up with this at for your Canada Day BBQ and everyone’s going to be asking you for the recipe or technique.
Ingredients Needed:
one white cake mix
one red velvet cake mix
2 batches of my Best Buttercream Icing
Supplies Needed:
2 icing tips, Wilton size 18 or 17
2 icing bags
(2) 9″ cake pans
Bake up your cakes according to the instructions.
Once they are baked, freeze them. I would make these days ahead of time and wrap them up tightly. This will save you time on the day you ice it.
When your 4 cakes are frozen, whip up a batch of my buttercream icing. Take the frozen cakes and stack them together in alternating colors, with a little layer of icing between each cake, to hold them together.
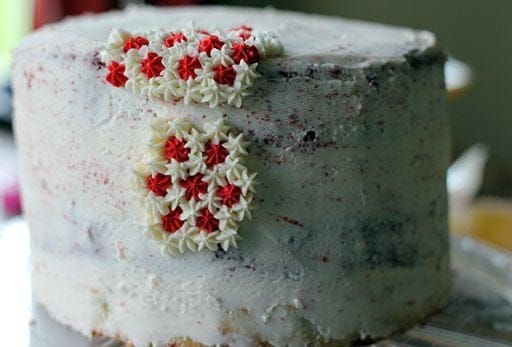
When they are frozen, you can trim the edges beautifully with a serrated knife, so you have a nice straight matching side to ice, like the picture below. Doesn’t even have to be perfect, but this works wonders to shape your cake nicely.
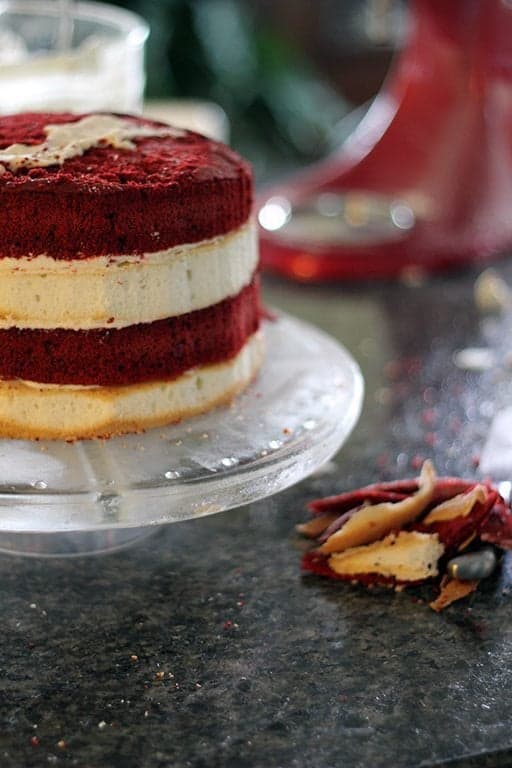
Once you have the layers on top of each other, put on a crumb coating and place back into the freezer. Freezing the crumb coating makes it so easy to work on when it’s time to pipe the little stars.
Now, the 18 tip by Wilson has to be the most common tip in cake decorating out there. You can buy it separate from any cake decorating kit at almost any craft store. I buy mine at Michaels. You will use it more than once, it’s a good investment.
For this cake I used the 17 and 18 tip, because I didn’t have two 18 tips.
Let me correct that ; I couldn’t FIND my other 18 tips. I must own about 3!
Color around 1 cup of icing as red as you can get it, Wilton has a nice no-taste red that’s perfect for this. Fill an icing bag ( I use the disposable, they are amazing!) with red icing and the #18 tip. Fill another bag with white and top with a 17 or 18 icing tip.
Then pipe this pattern. See how easy this is? It has to be a red one surrounded by white to achieve the correct look.
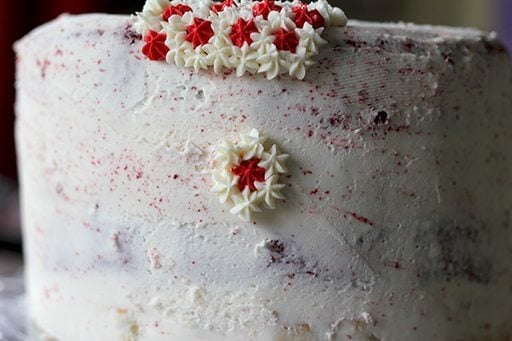
Then start filling it in like this…..see those red between the white?
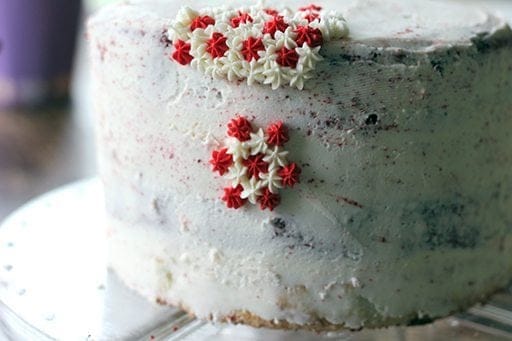
And then continue on like this! See that gorgeous, easy pattern emerging? The best part? It’s so, so forgiving. Make a mistake? Phhhht, no one is going to notice at all!
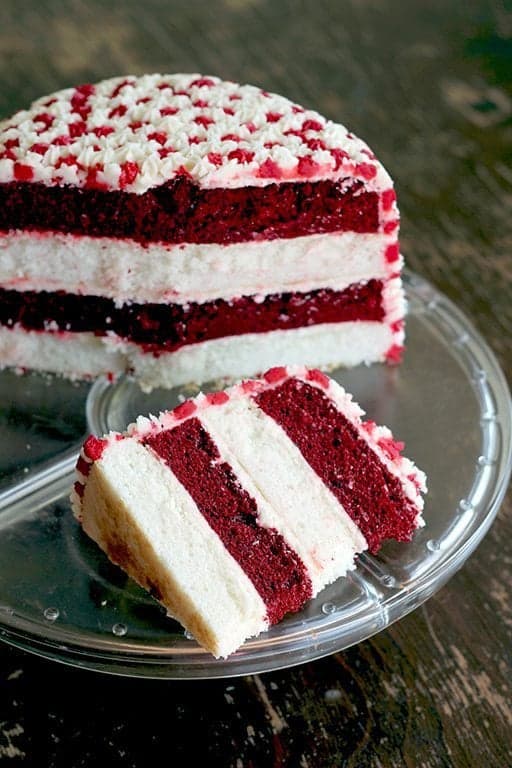
Here’s the inside of the cake, how wonderfully festive for Canada Day!
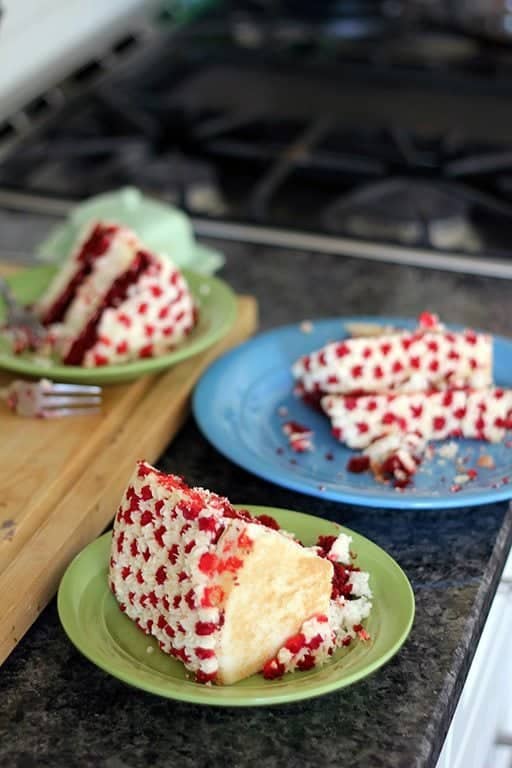
Now this shot isn’t what I wanted it to be. I had planned out a gorgeous slice/inside shot. The night before we cut the kids two small slivers to enjoy and left the cake in the fridge for the next day.
My daughter went downstairs the next morning, took the entire cake on that gigantic heavy cake stand out of the fridge and cut everyone pieces for breakfast.
I love that kid so much. Cake for breakfast, indeed.
What I didn’t love is that my beautifully planned cake shot was just gone. There was no piecing the mess below back together.
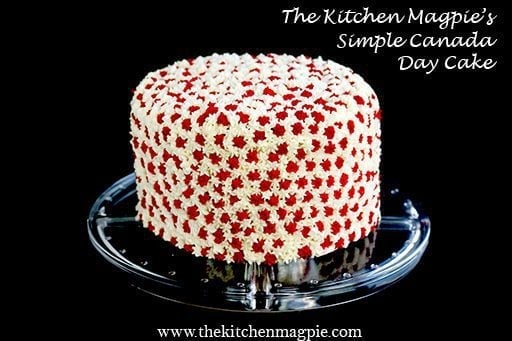
So here it is. A Canada Day cake that is as easy as pie -am I mixing metaphors here or what- and something that anyone can whip up with little money spent, little investment in materials and a big Canada Day Fireworks bang for your buck!
Happy Canada Day weekend everyone!
The Eats Cake For Breakfast Magpie










ChantelM1 says
I am currently awaiting on my crumb coat to set. What a stunning cake. Thanks for sharing
queenb says
Oh, and I forgot to mention the cake platter! I have the fancy-dancy glass platter like in the picture, but said cake is too freaking tall for the lid!! So what do I do? Wedge my son’s erasers under the edge of the lid to lift it up, then wrapped plastic wrap around the gap to keep out the air. Where there is a will, there is a way!
queenb says
As a complete rookie at cake decorating, your instructions were detailed enough that I felt confident enough to give this a try. A few tips for the extreme rookies such as I:
– Cakes tend to bake with a curved surface, so to get them to stack neatly on top of each other like the picture shows, I had to shave off the TOP of the cakes, as well as the sides. Try to avoid slicing your fingers off in the process, as I almost did.
– I re-froze my cake after I applied the crumb coating, as instructed, but the cake was sweating as I started decorating it with the red-white flower pattern, and many times the flower fell off…into my mouth.
– There’s nothing simple about applying about 1000 little flowers all over a large cake. I am still trying to straighten out my gnarled, cramped fingers.
– Anyone know how to get red food colouring off your hands?
– You need more white icing than red. I ran out towards the end, so my cake now looks like it has a red trap door at the back.
kyovdoshuk says
Is there a link for the “not do easy” chocolate cake that was mentioned at the start of the post? I would love to try it.
Suguna Raane says
Hi good morning! Your cakes and icings are awesome. I also bake but my butter icing is always yellowish/beige….i couldn’t get it white as snow. I tried putting in white colour paste but did not work. How to make it pure white? Thank you.
karlee says
mmm….ok next time we get together you have to make a cake. haha!
ACanadianFoodie says
And love that the family photo is back on the bottom…. XOXOXOXO
thekitchenmagpie says
_u*******@li******.com
" profile_url="https://www.livefyre.com/profile/2091071/" ns="true">ACanadianFoodie I’m getting there website-wise. Still more to go back on, but I am happy with it. P.S. my epiphany is that I am a SLACKER compared to almost everyone I met at BlogHer! Maybe I will post about THAT haha!
ACanadianFoodie says
Love your new initiative. Love that you were inspired while away. I am seeing a ton of new changes here, so the inspiration is evident… there is now advertizing, new look, new ideas… bravo!
Now rub it off on moi!
XOV
DaniDontknowtec says
@KitchenMagpie that looks fabulous. I might try the design on cupcakes.
KitchenMagpie says
@DaniDontknowtec It would make beautiful cupcakes! Send me a pic to share with everyone if you do!
supersu says
i love it! THANK YOU for realizing that ‘we’ all don’t have the time, knowledge or equipment to make the over the top impressive stuff! this actually looks do-able!
and thanks too for the simple step-by-step instructions re: icing pattern. honestly wouldn’t have thought such beauty so simple to achieve.
i prob wont attempt this weekend, but might just try it out soon!
happy canada day
cheers
su
thekitchenmagpie says
Aw, you’re welcome Su! It’s a good challenge for ME too, to not get so fancy and forget about all my readers. It was yummy too!
Happy Canada Day!
Asiya says
Love this cake!!!! At first I thought there were mini maple leafs on the cake!! Very cute…Happy Canada Day!
thekitchenmagpie says
_u********@li******.com
" profile_url="https://www.livefyre.com/profile/4873231/" ns="true">Asiya It worked out well that it does look like little maple leafs! Pure accident, though I would love to claim I thought of it 😉
Happy Canada Day!!