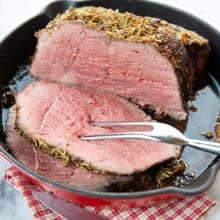
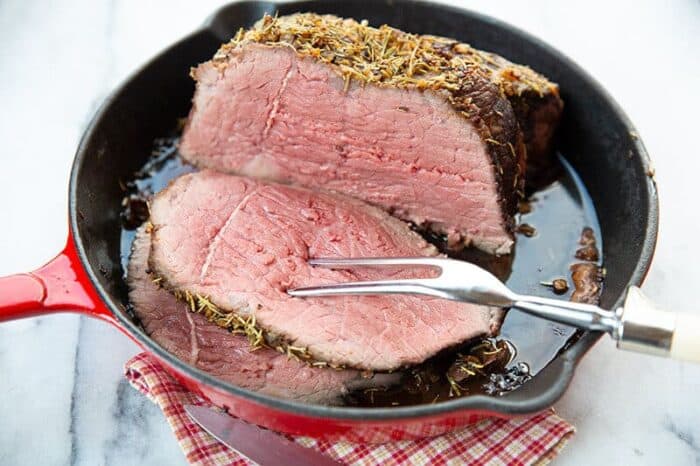
With just three ingredients, it’s super easy to whip up this mouth-watering dish packed full of home-cooked goodness. When it comes to cooking an equally nutritious and delicious dinner, this is as low maintenance as it gets! And it’s a really affordable meat to buy, too.
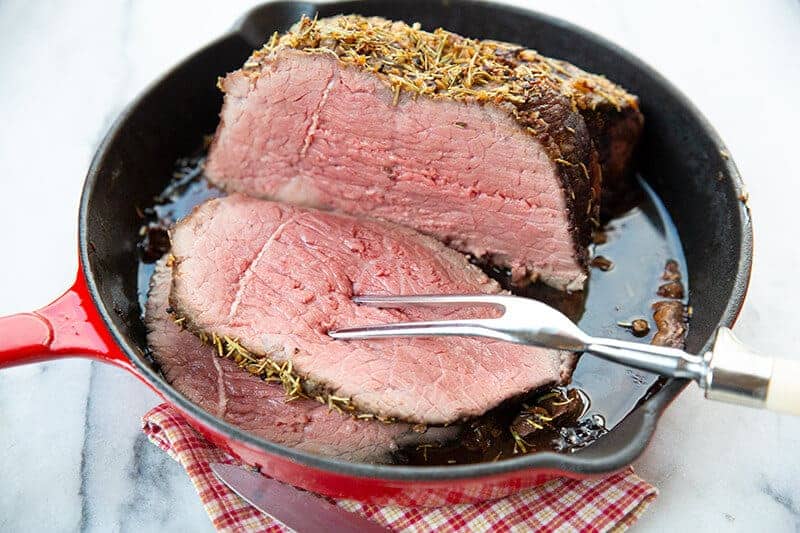
If you’re not a whiz kid in the kitchen just yet, this is a really great way to get started on building your confidence behind the cooker honing those pro-chef skills you have yet to discover! Or, you know, you could just have it for dinner for the rest of your life. I’m not sure anyone could ever get sick of this Buttery Herb and Garlic Bottom Round Roast!
How to Cook a Bottom-Round Roast
- Preheat the oven to 500 degrees Fahrenheit.
- Pat the bottom round roast dry with paper towels to allow the butter mixture to stick.
- Place the roast in an oven-safe skillet. Combine butter, rosemary, and minced garlic. Spread the mixture by hand over the roast, covering as much as possible.
- Place the roast in the oven, close the oven door, and reduce the temperature to 475 degrees Fahrenheit.
- Roast for 7 minutes per pound, and then turn the oven off completely (keeping the oven door closed).
- After 1 hour, turn the oven on to 200 degrees Fahrenheit and cook for approximately 1 hour or until the internal temperature of your roast reaches your desired temperature (rare, medium, etc).
Is Bottom Round Roast Very Tough?
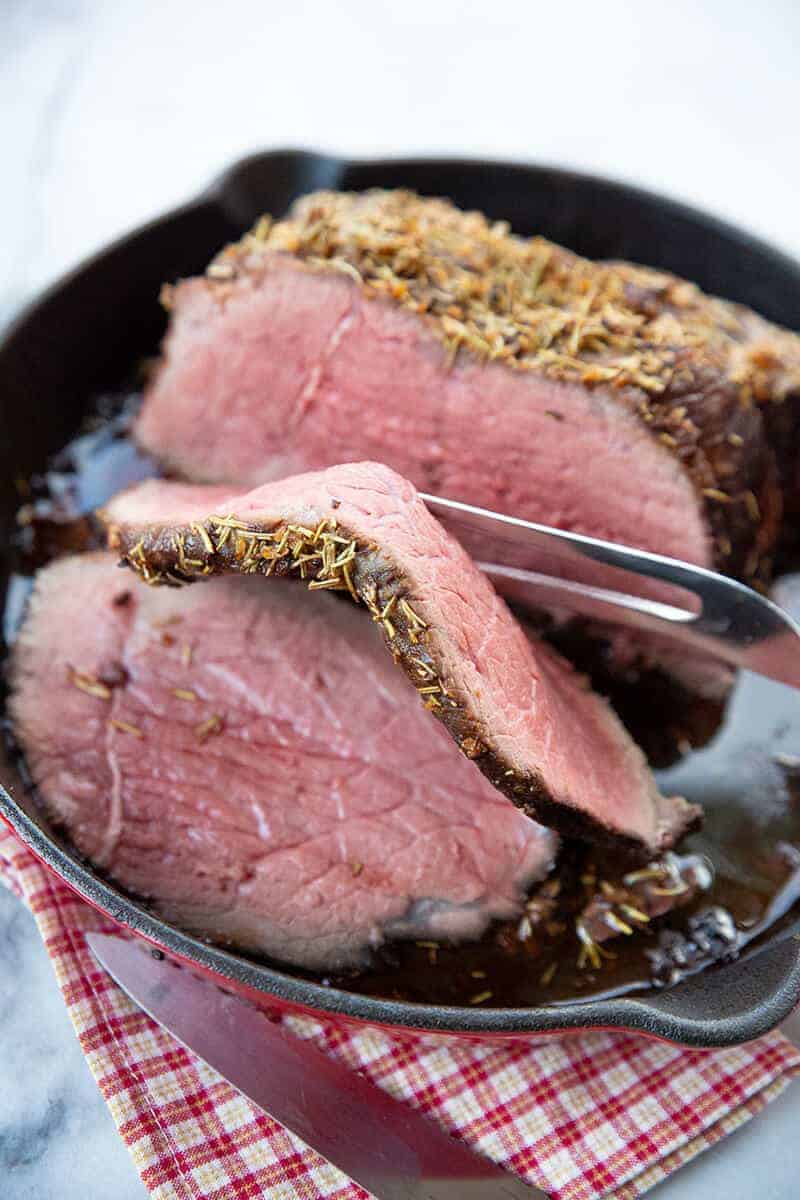
Bottom Round Roast is affordable so that it can be pretty tough. I mean, it literally comes from the bottom of a cow, so that makes sense! But if you cook it correctly, your Buttery Herb & Garlic Bottom Round Roast can be pretty tender and delicious. It won’t be as tender as a fillet, but close enough for what you pay for it! Contrary to what many people think, it’s also full of flavor.
Note
It’s still worth investing in an electric knife (if you don’t have one) for slicing this roast, as it’s still going to be a little tougher than a more expensive roast.
Bottom Round Roast is One Of The Healthier Red Meats
Bottom Round Roast is tough for a reason. The bottom end of a cow has less intramuscular fat because it’s highly exercised (those cows have been doing their glute activation work!). If you’re a fan of red meat but want to stay healthier, this is an excellent option for you and your family.
What Should I Serve With a Bottom Round Roast?
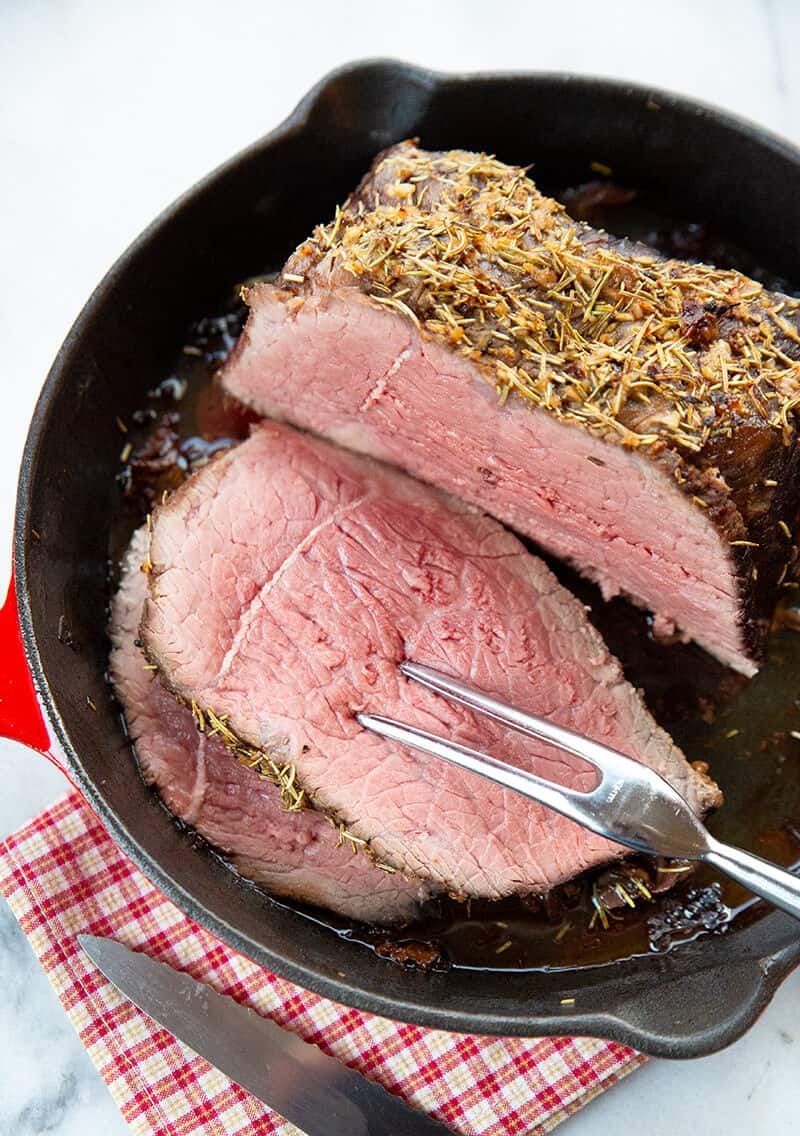
My advice here is to keep it simple. Why complicate something that’s already super easy to cook? Simply serve it with a side dish of potatoes and vegetables for a hearty and satisfying meal!
Can You Freeze Your Leftover Buttery Herb & Garlic Bottom Round Roast?
Your cooked Bottom Round Roast can last up to 4 days in the refrigerator. But if you want it to last a bit longer, you can freeze it in covered, airtight containers or tightly wrap it with freezer wrap or heavy-duty aluminum foil.
This easy-to-make Buttery Herb and Garlic Bottom Round Roast is jam-packed with flavor, and I’m 99% sure it’ll end up on your regular dinner list once you give it a go (and only because 1% of you might be vegetarian!). Enjoy!
Other Roast Recipes To Try
- Prime Rib Roast: this juicy cooked prime rib roast is culinary heaven!
- Top Sirloin Roast: cook up a fabulous family dinner with this economical roast option!
- Dutch Oven Pot Roast: This yummy recipe cannot be beaten! It is especially nice to make during colder months.
- Creamy Mushroom Beef Chuck Roast: this is the ultimate crowd-pleaser for mushroom and roast lovers with minimal time to spend in the kitchen!
- Dill Pickle Pot Roast & Pickle Gravy: for all of the pickle fans out there, why not get adventurous with this delicious Dill Pickle Pot Roast?
Happy cooking!
Love,
Karlynn
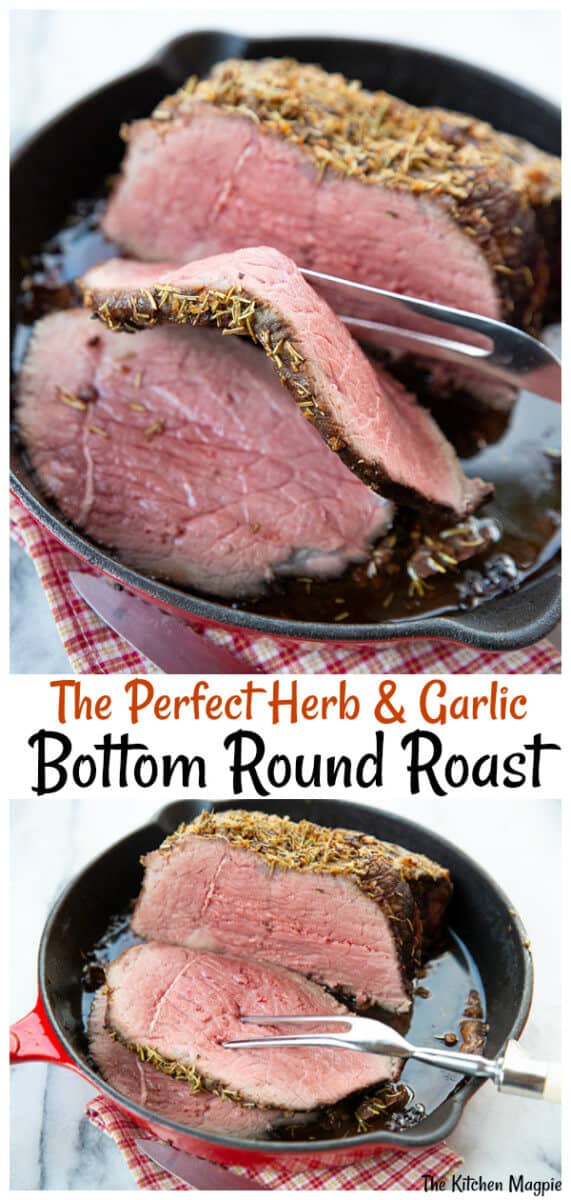
The Perfect Herb & Garlic Bottom Round Roast Recipe
Ingredients
- 1 four pound beef bottom round roast
- 1/4 cup butter
- 1 tablespoon rosemary
- 1 tablespoon minced garlic
Instructions
- Preheat the oven to 500 degrees Fahrenheit.
- Pat the bottom round roast dry with paper towels to allow the butter mixture to stick.
- Place the roast in an oven safe skillet. Combine butter, rosemary and minced garlic. Spread the mixture by hand over the roast covering as much as you can.
- Place the roast in the oven, close the oven door and reduce the temperature to 475 degrees Fahrenheit.
- Roast for 7 minutes per pound and then turn the oven off completely (keeping the oven door closed).
- After 1 hour, turn the oven on to 200 degrees Fahrenheit and cook for approximately 1 hour or until the internal temperature of your roast reaches your desired temperature (rare, medium, etc).
Nutrition

PIN THIS RECIPE to your DINNER RECIPES Boards and Remember to FOLLOW ME ON PINTEREST!





Nancy Wroblewski says
I thought it was an excellent recipe. I had a 2.6 lb roast. Baked it at 475° for 18 minutes. Turned the oven off and left it in for 30 minutes. Let it rest for for 15 minutes. A perfect medium rare. Had enough drippings to make a nice rich dark brown gravy. Delicious!
Matt says
I cooked a 3lb beef bottom round roast following the recipe to a tee. Used a cast iron pan coated with butter and spices. Over set to 500 waited for preheat to finish. Put the roast in the oven and immediately dropped the oven set point to 475 and cooked for 20 mins. Set time for 1 hour then opened oven to insert meat thermometer and the internal temp was already 165. The meat was like a rock. We did salvage some from the center sliced super thin. Any tips on what went wrong would be appreciated but like I said, I followed the directions to a tee.
Thx, Matt
Karlynn Johnston says
Hey the roast was too small. I start with a 4 lb roast for this recipe. What I would do for a smaller one is test around the 30 minute mark during the dropped temperature. Your oven might also heat high as well compared to others.
Mark Baldwin says
These negative reviewers are ridiculous. They just are bad cooks. You don’t cook a 1 inch steak the same length as a 2 inch steak so why would you cook a 3lb roast same as a 4lber. Common sense! And use a damn thermometer. Plus you should know your oven by now.
Pirate Morgan says
I learned two things from this recipe 1) roast beef only needs a slight coating of olive oil, salt, pepper, and a few slivers of butter in slits at the top to make a nice crust and 2) 200 degrees is just way too low to “finish” the roast, and I kind of thought that with 4.75lb roast cooked to 135 degrees (medium), in fact, I bumped up the temp to 275 after an hour and it still took another hour and a half to reach temp (my oven is accurate as checked with thermometer).
The herbs and garlic are a little much. You wouldn’t want to subsequently make a sandwich from this roast, plated only. But the cook process was somewhat a win, made meat realize that I wanted a nice “crust” and that this initial high temp process does it. Otherwise, thanks for the recipe, just wasn’t our cup of tea.
Gina says
Yummy! My roast was only 2 lbs so I took the advice from others in the same situation. It was exceptionally tasty. Thanks. What a great way to make a small roast really quickly with great flavor and not tough.
I don’t see any reason to not try this method with the much more palatable roast, the Rump Roast. Do you??
Gina
Shannon says
Made this tonight. Came out great. I had a smaller roast only 2 Ibs. I turned oven off for 30 minutes and turned the oven to 200 for 20 minutes. Came out wonderful juicy and flavorful and medium rare.
Steve Warner says
First off, this recipe / method is fantastic. Best bottom round roast we’ve ever had.
Second, the additional hour of cooking time was absolutely unnecessary.
We got a 3.3 pound bottom round roast from Aldi. I didn’t have herbs, so I coated it with salt, pepper and garlic salt. Then I melted butter and drizzled it over the top until it was coated.
I heated the oven to Convection Roast at 500 degrees, put the roast in on a roast pan with water in the bottom, and set the oven to 475. I cooked it for 23 minutes, then turned the oven off.
Since my roast was 3.3 pounds, not 4 pounds, I let it sit in the oven for 50 minutes rather than an hour.
I took it out after an hour, stuck my oven’s meat thermometer in it, and then set the thermometer probe to cook until it was 120 degrees internal.
The oven immediately turned off. I set the probe again and watched as I pressed Start. The probe read back that the internal temperature was already 143 degrees. I wasn’t prepared for this, but I took the roast out and let it sit for about half an hour as I prepped the other food.
I expected to cut into the roast and have it be raw, but to my surprise, it was perfectly pink. Not undercooked. Not overcooked. It was like candy. The entire family gobbled it up. Thank you for this cooking technique! I’ll be using this again in the future!
Lori L Watson says
Best bottom round roast I have ever made!
Kyle says
How would this recipe change if I were cooking 3 separate roasts, about 3 lbs each? Obviously I will adjust the other ingredients appropriately but I am worried about cook time. My initial thought was to add the lbs together and cook 7 minutes per lb, but with them being separate maybe that is overkill?
Any help is appreciated.
jo says
No do not add all of the weights together to determine the cook time
. Just cook it as though it were one 3 pound roast. You only add all the weights together for a microwave.
Lori J Lorenz says
I am giving a generous 4 stars, because it did taste good, but I had to knock off a star because it did not turn out as expected. I’m not necessarily blaming the recipe. My stove tends to be a little unreliable as far as temperature and even cooking go, and I do not have a cast iron skillet I could use, so I used a roasting pan. My roast was just over 2.5 lbs. I followed the directions to the t. At the end of cooking time, my roast was, for all intents and purposes, raw. Not medium rare, not rare..raw. Barely browned on the outside. Nothing stuck to it, no crust of garlic and rosemary. It all slid off into the bottom of the pan. As I had timed everything according to this roast, and everything else was ready, I was forced to put it back in the oven at 375 for a little while just to get it palatable for my family. As I said, I put some of the blame on my equipment. And it did have a nice flavor. I was just expecting something else a little closer to the photos attached to the article. Having said that, I will try it again.
Kenny says
The trick for recipes like this, the roast before cooking has to be brought up to room temp before cooking. If you cook it straight from the refrigerator, you’ll get raw on the inside. A roast about 4 lbs will need to sit on the counter for around 4 hours to be room temp. I hope you get better results with this trick!
Bonnie says
Time is off had a 3 lb roast followed the instructions to a t and was way over done.😞
Anne says
Melt in your mouth good. My new recipe for cooking a roast. You will NOT be disappointed.
Dumpy says
Kool
Nicole says
Question, it says total time for this recipe is 1 hour 40 min but as I just put my roast in the oven, I see it says to cook for 7 min per lb then shut off oven for 1 HOUR then turn on to 200 degrees and cook for another HOUR. That’s a total of 2.5 hours! I figured we would eat by 8 but this means the kids won’t eat until after 9 pm. Am I missing something? Anyway I can speed up the recipe time without compromising the flavor and drying the meat out?
Karlene Ashby says
Following. My math is the same as yours. Want to make sure I’m not missing anything. Also, curious on when you would recommend tossing in some carrots and potatoes?
Shelley says
As I was doing a bottom round roast search, I found another version of this same recipe, same website, and it said 2 1/2 hour for cooking.
Noura A says
Almost forgot to rate it. 5 stars for sure!
Noura A says
I was a little nervous about making this recipe after reading the mixed reviews so I tried to pay attention and follow the recipe as closely as possible.
My roast was just under 2 pounds (1.77 lb to be exact). I didn’t have fresh garlic so I used garlic powder. Followed instructions as outlined in the recipe being careful to factor in the size of the roast I am using. I let it roast at 475 for 12.5 minutes then turned the oven off. It smells amazing so far and I’m not experiencing any crazy smoke billows (I’ve made sure to keep my oven CLOSED though. That was hard to do because my oven light is out and I really wanted to look at it. LOL.
The roast I’m using is roughly half the size as the 4 pound roast in this recipe so I cut the rest/cook times in half (left oven off for 30 minutes and roasted at 200 degrees for 30 minutes).
I let it rest for 20 minutes and served with fresh garden salad, mixed veggies and biscuits.
Oh my goodness, y’all! It was way better than I expected! I cannot wait to try this recipe EXACTLY as written with a 4 lb roast. So so good! Served to a family of 3 and it’s all gone!
Thank you for sharing this amazing recipe. Will be back for more.
jasmine says
Exactly – I AM TOTALLY CONFUSED
Rachel says
Can you please work on this? The wording makes no sense as far as time. It doesn’t make sense to heat the oven to 500 degrees and then open the oven door (dropping the temp immediately), then dropping the oven setting to 475. I got really confused about the 7 min per pound and then an hour? Is that keep it in the closed oven for the remainder of an hour with the heat off? I guess I’m about to see.
Sian says
The recipe states, “1 4 pound beef bottom round roast”. Is that really how big it’s meant to be?
Sian says
Oh….I guess that’s meant to be ‘one, four-pound bottom roast”! Maybe take off the one for newbies like me. Obviously, I don’t do roasts often! Four pounds is a more reasonable size.
Karlynn Johnston says
You heat the oven to 500 because you do experience that temperature drop. Then you set it for 475, hopefully not having lost that much heat.
Then if you have a 5 lb roast you would roast it for 7 minutes per pound. that’s 35 minutes at 475 and then you turn off the oven.
Then if the roast needs cooking further to reach the temperature you desire cook it at 200 until they reaches the temperature you want.
This is the residual heat cooking method, you heated up and then cook with the residual heat in the oven. But if you have a larger roast it will need more time and you have to cook it at 200 after as the residual heat runs out. if you have a smaller roast it won’t need the other hour that’s why it says until it reaches the temperature you desire.
If you follow the directions exactly the roast will work out.
Jack says
Cook times are way to long. The last hour probably isn’t even necessary
Mr. Kitchen Magpie says
Yes it is. If it wasn’t necessary, we wouldn’t have put it in the recipe. We’ve made this numerous times as is.
Irene Morales Ward says
Haven’t made this but got a 4 lb bottom round and intend to make it as instructed. Only question…Can I add salt and pepper to the butter, garlic rosemary mixture? Is there a reason they are omitted?
Jack says
Cook times are way to long. The last hour probably isn’t even necessary
jason says
Just want to say this was a great recipe. I did do a dry rub of salt and pepper prior to putting on the rub 4 hours in frig.
Beth White says
My roast was a bit smaller so I only left it in the oven for 30 min on 200 instead of an hour. I let it sit for about 20 min before slicing. It was delicious!! Cooked perfectly and very tender. I changed the seasonings a bit but used the butter and the garlic. Will defiantly use this recipe again!
Benny says
I followed this recipe and at the point of restarting the oven the roast was at 135*!
So basically I took it out After waiting the hour and with only 28 minutes of baking it was delicious! Does anyone have knowledge on trying this method on other cuts of roasts?
Steffany B. says
Can I bake this in a glass or metal pan, rather than cast iron?
If I wanted to make roasted carrots and potatoes with this in a separate pan, do you have a recommendation as to when (or if) to pop them in?
I’ve made plenty of tasty roasts, but I wanted to try this method, as my elderly neighbor swears it works miracles on the toughest cuts of meat…
Kevin Parsons says
Absolutely fabulous, always had a problem with this little roast ,didn’t have the spices they asked for but did have the butter…cooked my little roast for 10min at 475 turned the oven off and continued for the 1 hour tested the temperature and for us it was perfect 145 I was worried as I could not cook it for another 1hour at 200…. but believe me it was perfect melt in your mouth this is now my go 2 recipe for this type of roast.
Marlene P says
Wow! I was so hungry for a beef roast. But, when I went shopping, the least expensive cut I could find was a bottom round roast. I knew it would be a less tender cut, but was hopeful that I could find a way to prepare it that would make it tender and succulent. Well, this recipe delivered way above expectations! My roast was only 2 pounds, so I reduced the final roasting time to 30 minutes at 200 degrees, checking internal temperature, and it came out perfect! It is moist and tender!
Karen Poling says
My question is the same as Kathy E. – The total time says 1 hour 40 minutes, but when I add all the cooking times together, I come up with approximately 2 hours and 40 minutes – 7 minutes X number of pounds + 1 hour in the oven with no active heat + 1 hour at 200 degrees. Help!
jasmine says
Exactly – I AM TOTALLY CONFUSED
Pat says
Dang brah. This recipe completely transforms a bottom round into a stellar piece of meat. Great recipe.
Shawn says
I did everything exactly as prescribed and this recipe was a deathtrap to a properly overcooked roast. The part that I think kills the whole thing is the final step: 200 degrees for an hour. Even taking it out significantly earlier, almost 30 minutes earlier, it was completely well done. I would say this is a cute website; from the onset, I found the temperatures and times questionable, but it had enough good ratings that I overcame that obstacle. Ultimately, dutch oven approach is the way to go.
Mr. Kitchen Magpie says
Shawn I hate to say this man but I have made this roast the same way for ages and not once has it been overcooked. If you are overcooking it, it’s because you aren’t measuring it properly with a meat thermometer. We can’t account for every type of oven out there and the rest of these commenters aren’t all wrong just because yours didn’t work out. Sorry!
Berfert says
Follow the directions as written. Once you stray, you are no longer doing it as directed. The worst reviews are from folks who add their 2 cents in with substitutions due to their “knowledge” or dietary restraints. Those reviews detract from following the directions as written which means you have created a whole different recipe/technique. I followed this to the letter in a cast iron pan, and the cook times were so fas that the garlic and butter did not have time to burn! My roast being just over 3.5 pounds had a total initial cook time of 23 minutes. Preheat to 500, place roast in, IMMEDIATELY DROP temp to 475 and cook for 7 minutes a pound for the 23 minutes. Cut oven off, let sit ONE HOUR and then reheat at 200 degrees… simple. Small apartment and no smoke. Lol. Paula Deen has a GREAT standing rib roast similar to this that I do every year. Cooking by TIME. Takes patience and skill. This recipe worked out great for this cut in lieu of eye round. No shortcuts required.
Shawn says
You’re wrong to assume that detractors deviated from the directions. I did everything exactly as prescribed and this recipe was a deathtrap to a properly overcooked roast. The part that I think kills the whole thing is the final step: 200 degrees for an hour. Even taking it out significantly earlier, almost 30 minutes earlier, it was completely well done. I would say this is a cute website; from the onset, I found the temperatures and times questionable, but it had enough good ratings that I overcame that obstacle. Ultimately, dutch oven approach is the way to go.
Kathy Perry says
I tried your recipe last night. DELICIOUS! I absolutely am planning on making this a regular meal! My husband loved the flavor! So glad I found your recipe
Monique says
Just made this and it turned out very good. The whole family enjoyed it. I feel the left over meat will be touch when reheated so as I do with pot roast leftovers I make barley beef soup… will do in my instant pot to make things faster.
Lauren says
Followed the recipe exactly and the butter and garlic burned and my whole apartment filled with smoke. The smell was awful.
Lena says
Lauren,
I’m attempting the recipe right now as well but I didn’t think that butter & fresh garlic on the outside of the roast would be a good idea because they both burn easily under high temperatures so I did a high temperature cooking oil (think any vegetable oil I did grape seed but it doesn’t have to be fancy) to rub salt pepper, a little garlic powder and dry steak seasoning instead. I have a very strong hood fan restaurant strength in my house and a ceiling fan and I still got smoke when I briefly opened the oven only three minutes after starting it to add my meat thermometer. Also I did not mince the garlic. I have made many prime ribs so I did slivers of garlic, made some small holes all over the roast with a pearing knife and stuffed the garlic inside the holes. That gives for a true delicious taste it infuses within the meat and it is the backbone of any good prime rib. Right now I’m waiting for the meat while it’s resting for an hour before I turn it back on and I’m hoping for a good result. We shall see. I will comment back after we eat dinner tonight. I know you’re not the author of the recipe. I know how hard it is when your apartment is stinky from food/smoke whatever and it’s really hard to get the smell out!
Lena says
Lauren,
I’m attempting the recipe right now as well but I didn’t think that butter & fresh garlic on the outside of the roast would be a good idea because they both burn easily under high temperatures so I did a high temperature cooking oil (think any vegetable oil I did grape seed but it doesn’t have to be fancy) to rub salt pepper, a little garlic powder and dry steak seasoning instead. I have a very strong hood fan restaurant strength in my house and a ceiling fan and I still got smoke when I briefly opened the oven only three minutes after starting it to add my meat thermometer. Also I did not mince the garlic. I have made many prime ribs so I did slivers of garlic, made some small holes all over the roast with a pearing knife and stuffed the garlic inside the holes. That gives for a delicious taste as it infuses the meat with rich flavor and it is the backbone of any good prime rib.
So far, I am really worried that I ruined a perfectly good roast. It looks burnt and I even avoided doing the butter and garlic on the outside and it has been in there just at an hour cooked in the middle rack. At very least, the outside is pretty blackened. We shall see. I will comment back after we eat dinner tonight. I really have been wanting to try one of these roast recipes that brings it up to high temperature quickly and then let it rest for an hour and then continues cooking it. I’m so glad I never attempted this for a holiday dinner. Maybe I should go back to all recipes or something a little more dependable. I’ve always just done the low and slow method. I hope my roast turns out OK this evening. I’m thinking that this shortcut is prob not the best.
I know you’re not the author of the recipe. I know how hard it is when your apartment is stinky from food/smoke whatever and it’s really hard to get the smell out!
Kathy E. says
Shouldn’t nt the cook time be 2 hrs and 35 minutes, if you add the hour it sits in the oven before turning temp to 200 degrees?